Manual install: WebFig and Winbox
Install the agent from the router’s own menus, with no computer that runs the CLI. Each step is a
form: its menu, the fields to fill in, and the form as it looks filled in. The values are the ones
mikroscope install writes, so mikroscope status, upgrade and uninstall treat the result as
their own. Winbox has the same menus and fields as WebFig, though no install has run in Winbox
(not tested); the pictures, and the run behind them, are
WebFig’s (Tested on).
Before you start
Section titled “Before you start”- The router runs RouterOS 7.24 or later, has the
containerpackage and has device mode with containers enabled: Requirements. Device mode has no page in WebFig; it is a terminal command (Device mode). - For the list memberships: the interface list and the address list your firewall drops by (
LANandLANsin MikroTik’s default configuration): Firewall lists. - For the image tar: the tar for the router’s architecture, renamed
mikroscope.tar(Offline install names each one).
The steps use the defaults below. To change one, change it in every step it appears in, the manifest included. Manual install: terminal lists every value and how the others follow from it.
| Value | Default |
|---|---|
| Tag, the Comment of every object | mikroscope:mikroscope (managed by mikroscope) |
| veth | veth-mikroscope |
| Router’s address | 172.30.10.1/30 |
| Agent’s address and port | 172.30.10.2/30, 9123 |
| Envlist | mikroscope-env |
| Root dir | mikroscope/mikroscope |
| Manifest | mikroscope/ |
| Image, registry pull | registry-1. |
| Image, tar | mikroscope.tar |
Scroll sideways to see every column
Keep the tag as it is, character for character: it is how the CLI recognises every object as the install’s.
Log in. Open http://<router address>/ and log in as an admin user. Then pick Advanced at
the top: the steps use the full menu tree, which Quick Set hides.
Filling in a form. A field shown only as a + button is unset: press + to open it. When RouterOS refuses an object, the form stays open with the reason under its buttons.
Write the install manifest
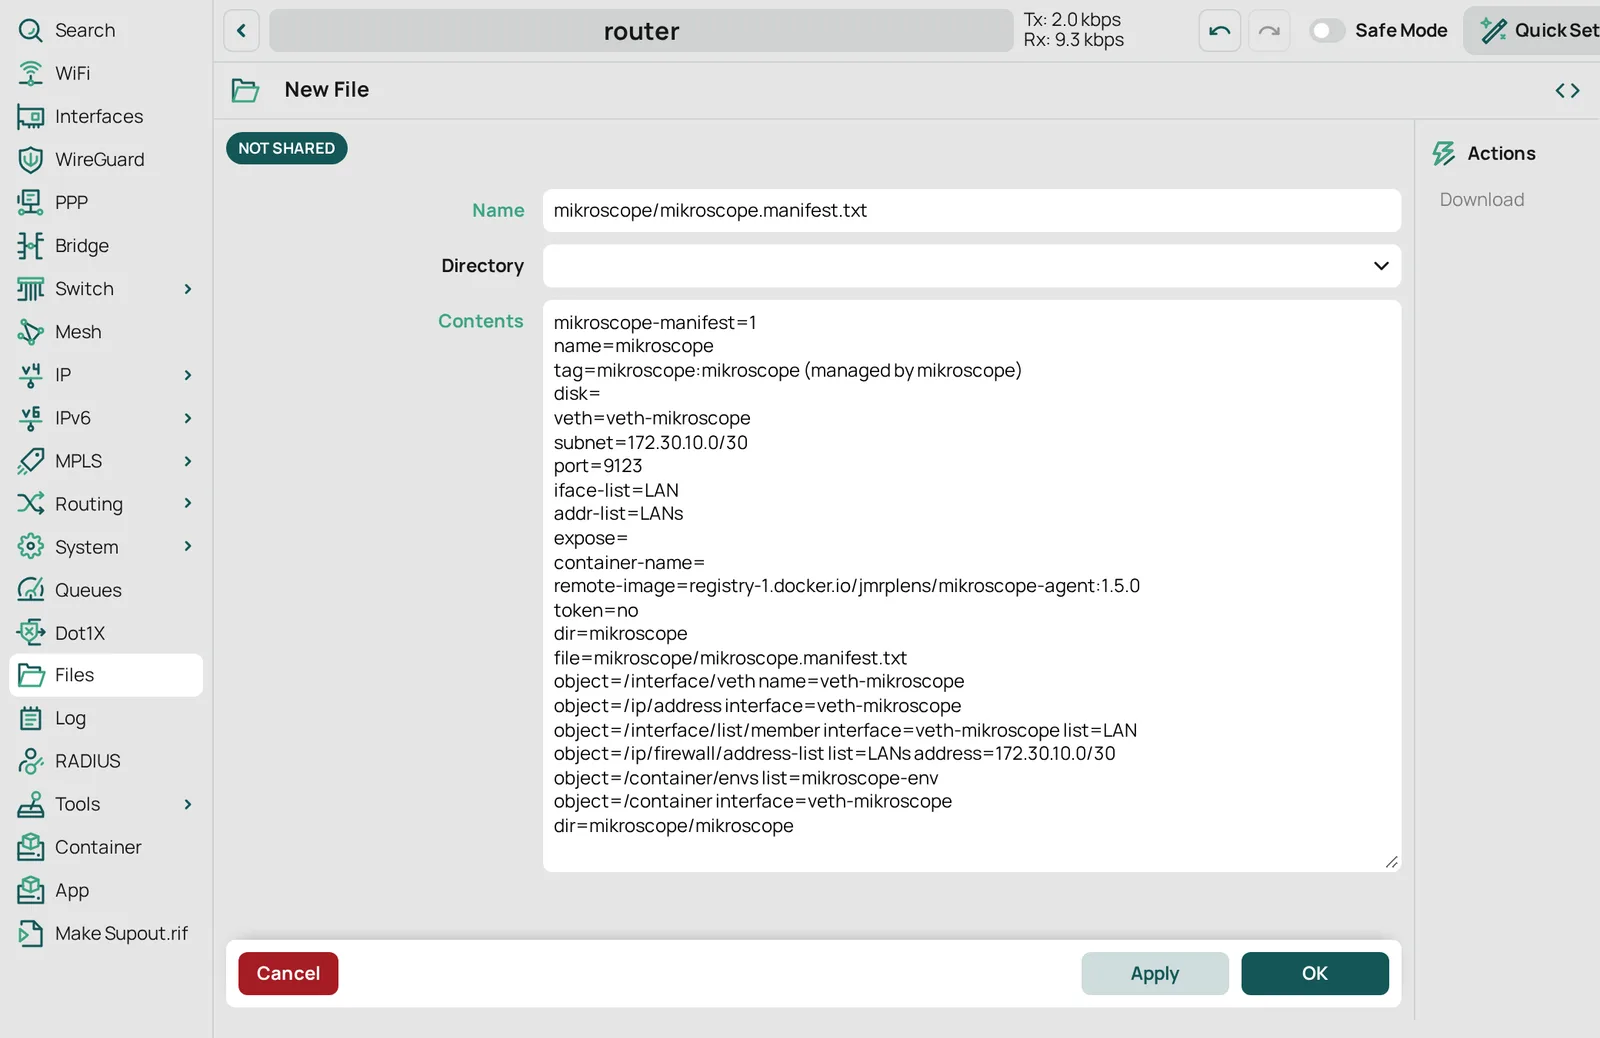
Section titled “Write the install manifest”The manifest lists every object the next steps create, so that mikroscope uninstall can find
them all.
Files › New › Text File:
| Field | Value |
|---|---|
| Name | mikroscope/ |
| Contents | the lines below, for the image source you use |
mikroscope-manifest=1name=mikroscopetag=mikroscope:mikroscope (managed by mikroscope)disk=veth=veth-mikroscopesubnet=172.30.10.0/30port=9123iface-list=LANaddr-list=LANsexpose=container-name=remote-image=registry-1.docker.io/jmrplens/mikroscope-agent:1.6.1token=nodir=mikroscopefile=mikroscope/mikroscope.manifest.txtobject=/interface/veth name=veth-mikroscopeobject=/ip/address interface=veth-mikroscopeobject=/interface/list/member interface=veth-mikroscope list=LANobject=/ip/firewall/address-list list=LANs address=172.30.10.0/30object=/container/envs list=mikroscope-envobject=/container interface=veth-mikroscopedir=mikroscope/mikroscopemikroscope-manifest=1name=mikroscopetag=mikroscope:mikroscope (managed by mikroscope)disk=veth=veth-mikroscopesubnet=172.30.10.0/30port=9123iface-list=LANaddr-list=LANsexpose=container-name=remote-image=token=nodir=mikroscopefile=mikroscope/mikroscope.manifest.txtobject=/interface/veth name=veth-mikroscopeobject=/ip/address interface=veth-mikroscopeobject=/interface/list/member interface=veth-mikroscope list=LANobject=/ip/firewall/address-list list=LANs address=172.30.10.0/30file=mikroscope.tarobject=/container/envs list=mikroscope-envobject=/container interface=veth-mikroscopedir=mikroscope/mikroscopeIf you skip a list membership, write none after its iface-list= or addr-list= and leave out
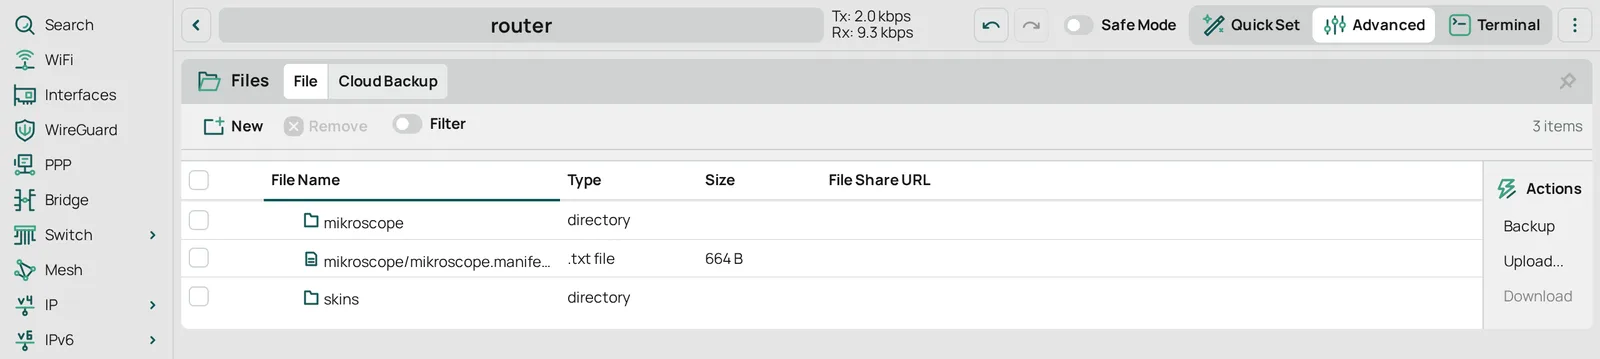
its object= line. OK creates the mikroscope directory with the file.
RouterOS script explains each line.
Create the veth
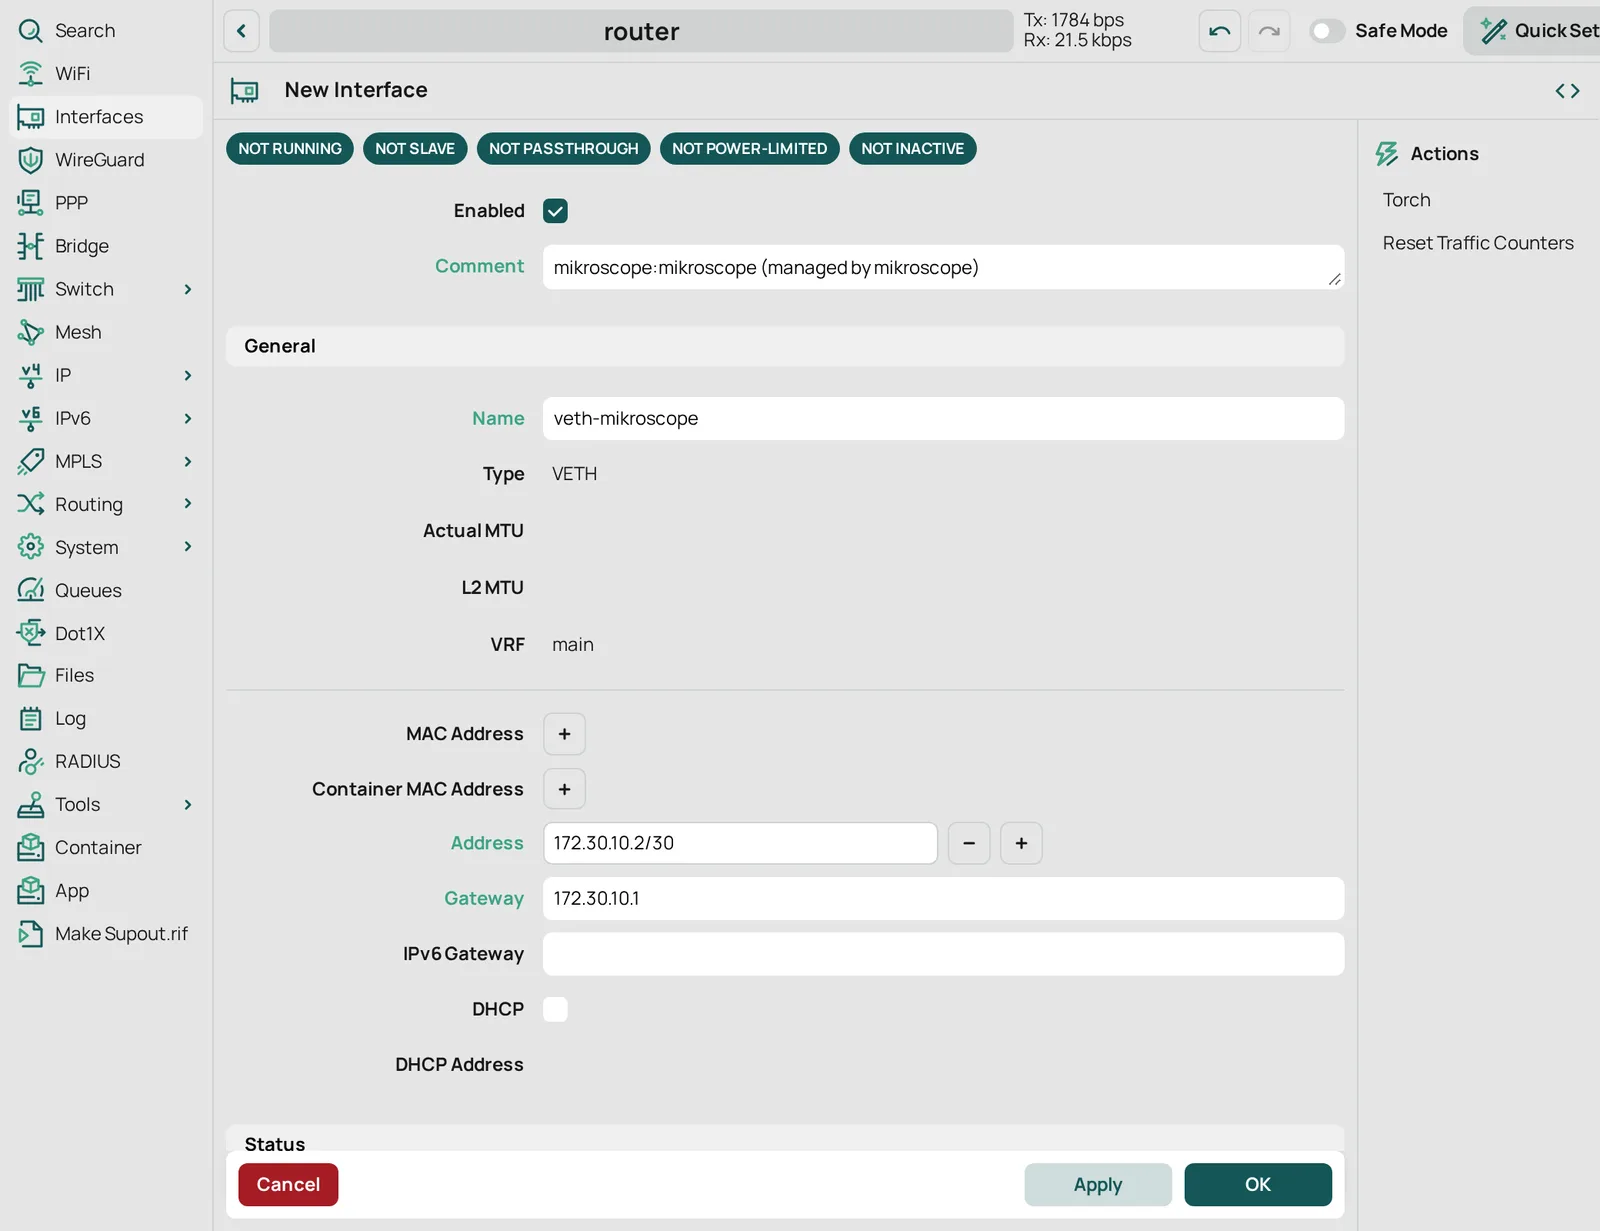
Section titled “Create the veth”Interfaces › VETH › New:
| Field | Value |
|---|---|
| Comment | mikroscope:mikroscope (managed by mikroscope) |
| Name | veth-mikroscope |
| Address | 172.30.10.2/30 |
| Gateway | 172.30.10.1 |
Leave the rest as it is.

Add the address
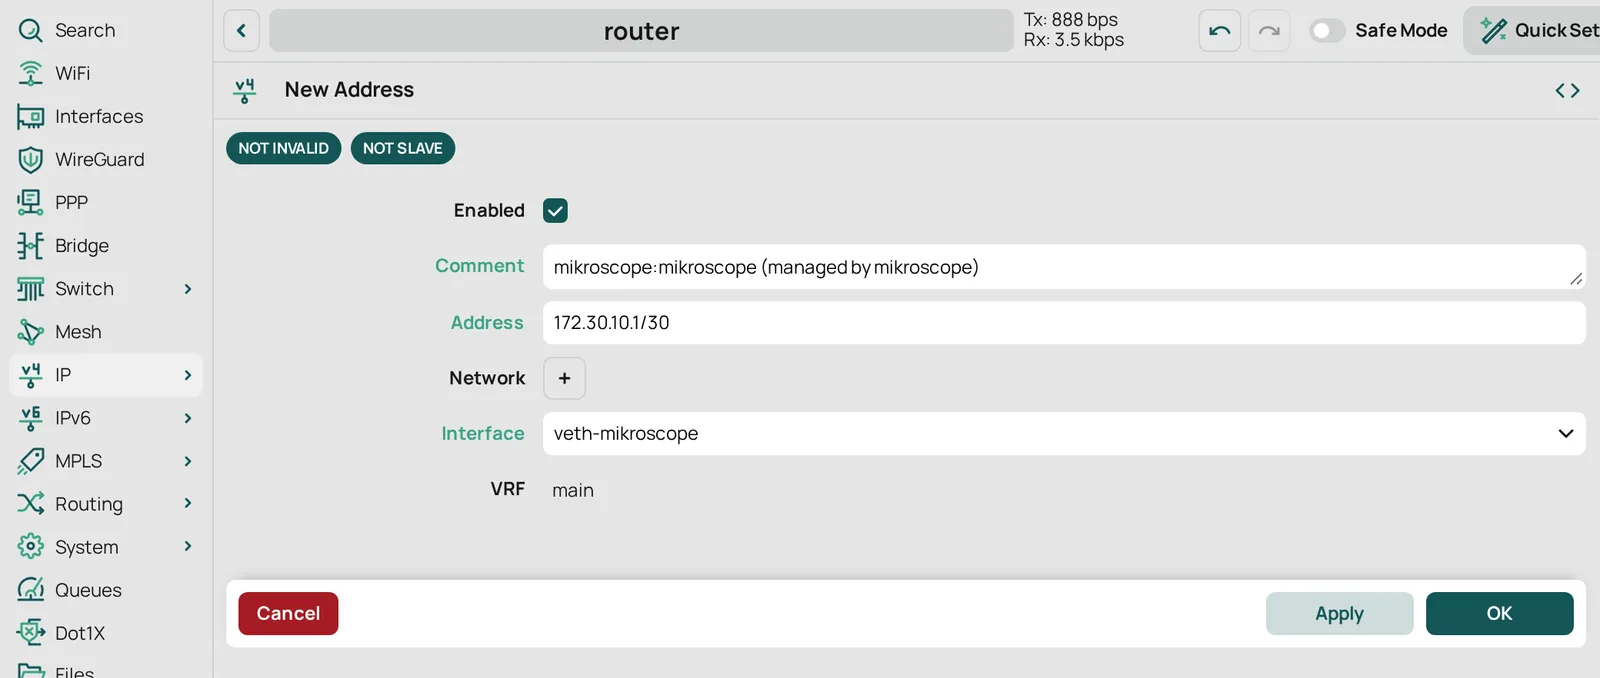
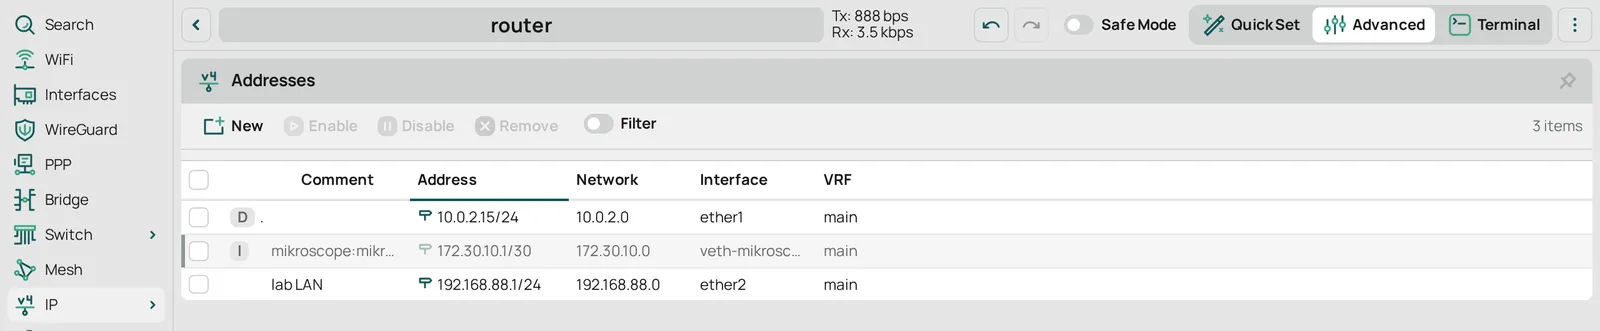
Section titled “Add the address”IP › Addresses › New:
| Field | Value |
|---|---|
| Comment | mikroscope:mikroscope (managed by mikroscope) |
| Address | 172.30.10.1/30 |
| Interface | veth-mikroscope |
Add list memberships
Section titled “Add list memberships”Optional. They let the agent’s replies past raw firewall rules that drop by interface list or by address list. A membership is not scoped to mikroscope: any other rule that matches the list matches the veth or the /30 too (Firewall lists).
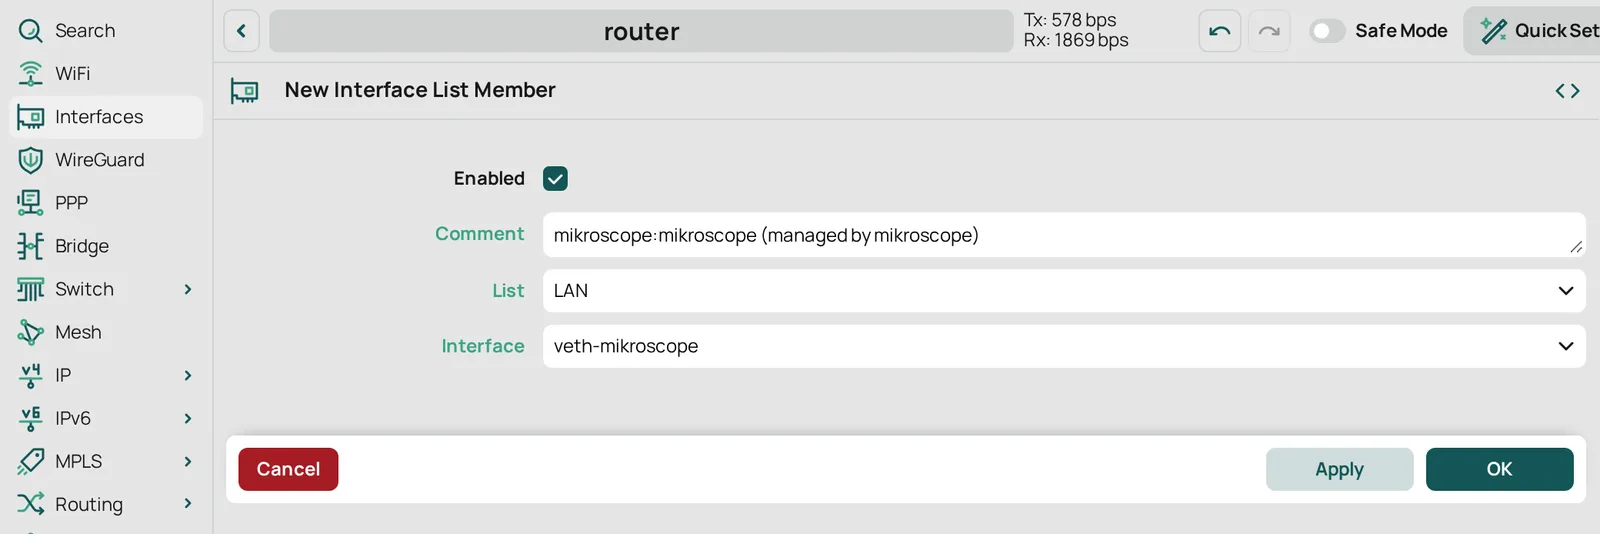
Interfaces › Interface List › New:
| Field | Value |
|---|---|
| Comment | mikroscope:mikroscope (managed by mikroscope) |
| List | LAN |
| Interface | veth-mikroscope |

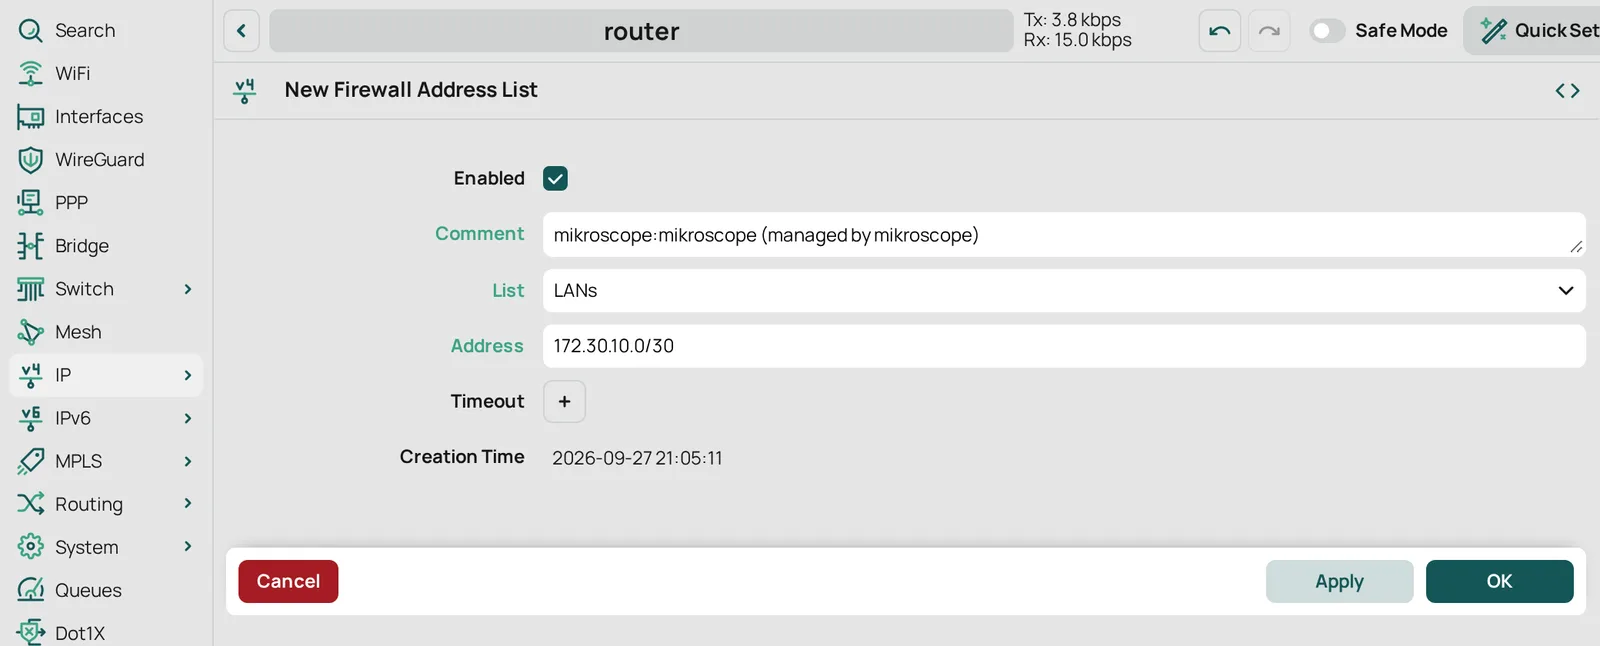
IP › Firewall › Address Lists › New:
| Field | Value |
|---|---|
| Comment | mikroscope:mikroscope (managed by mikroscope) |
| List | LANs |
| Address | 172.30.10.0/30 |

Create the envlist
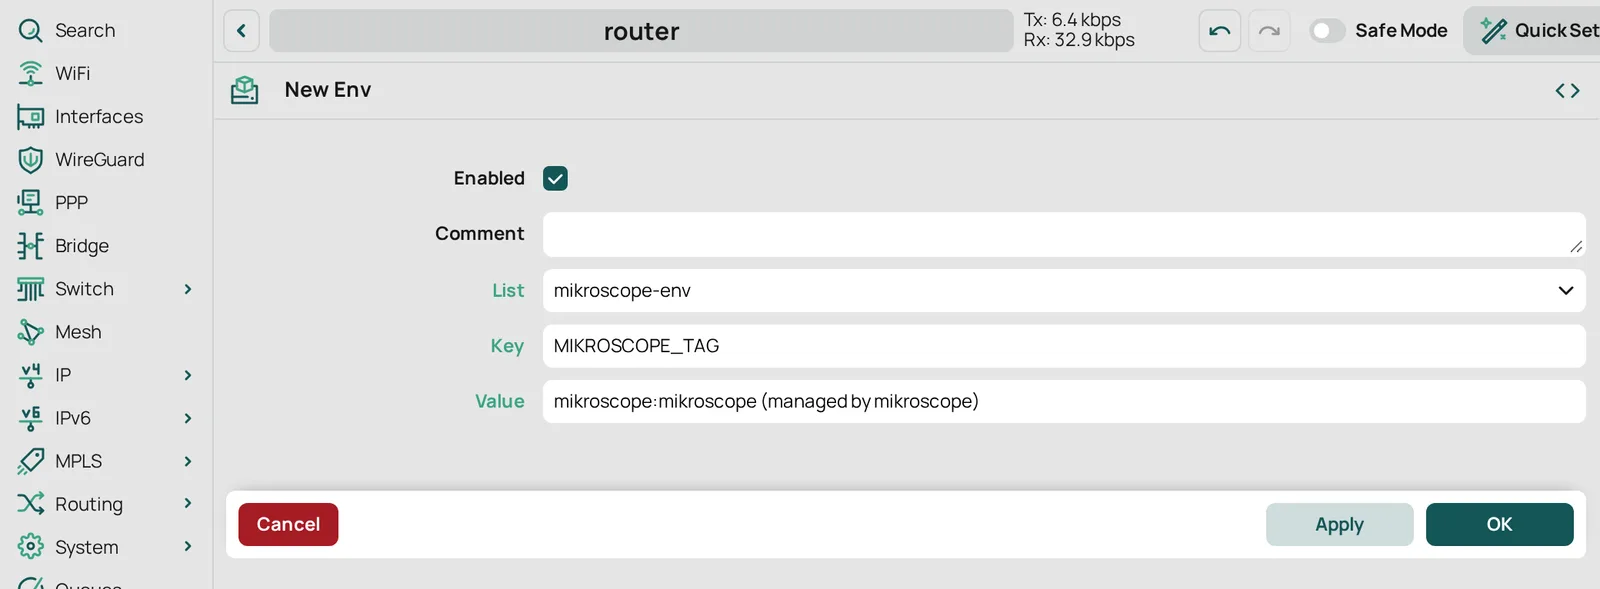
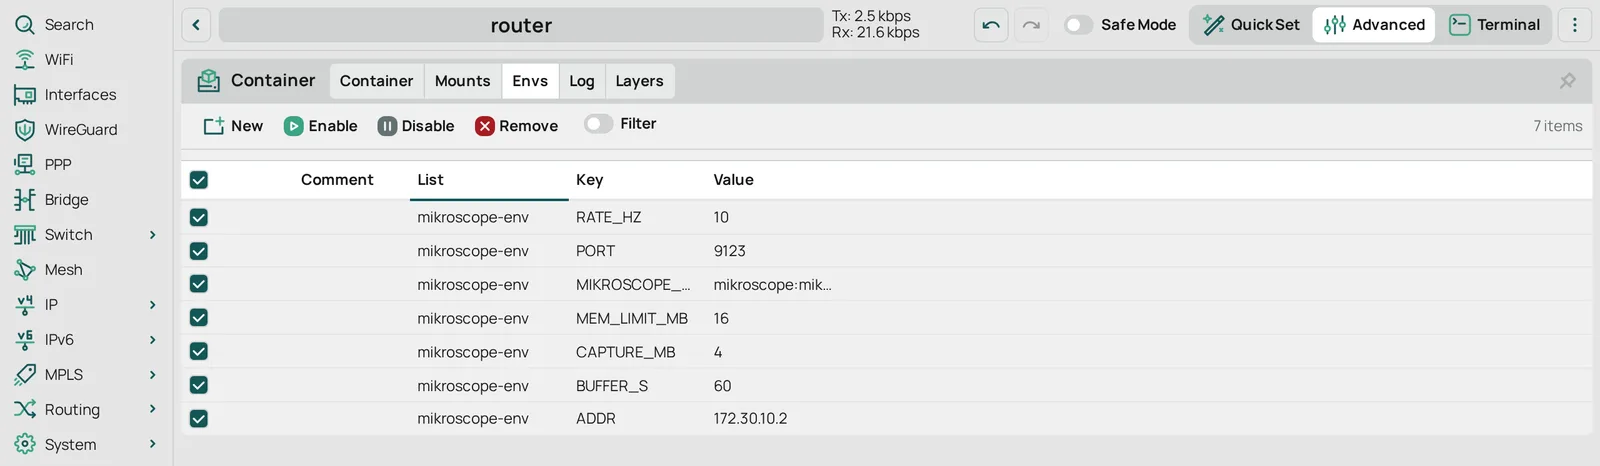
Section titled “Create the envlist”Container › Envs › New, once per entry, each with List mikroscope-env:
| Key | Value |
|---|---|
MIKROSCOPE_TAG |
mikroscope:mikroscope (managed by mikroscope) |
RATE_HZ |
10 |
BUFFER_S |
60 |
PORT |
9123 |
ADDR |
172.30.10.2 |
MEM_LIMIT_MB |
16 |
CAPTURE_MB |
4 |
MIKROSCOPE_TAG is how the CLI tells the envlist is the install’s. The other keys are the agent’s
settings: Environment variables.
MEM_LIMIT_MB follows from the rate and the ring; the
Script generator computes it for other values.
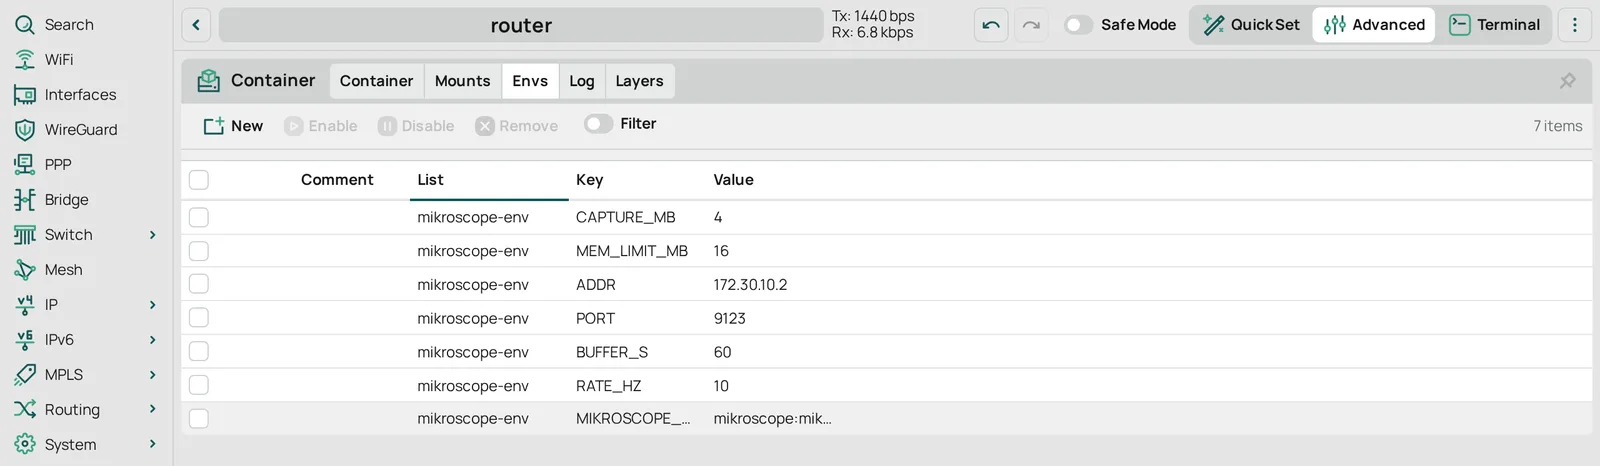
A TOKEN entry holds its value in clear, and WebFig shows it in clear in this list and in its
form (verified). Add one only for
Expose on the LAN, and treat any screen that shows it as a secret.
Create the container
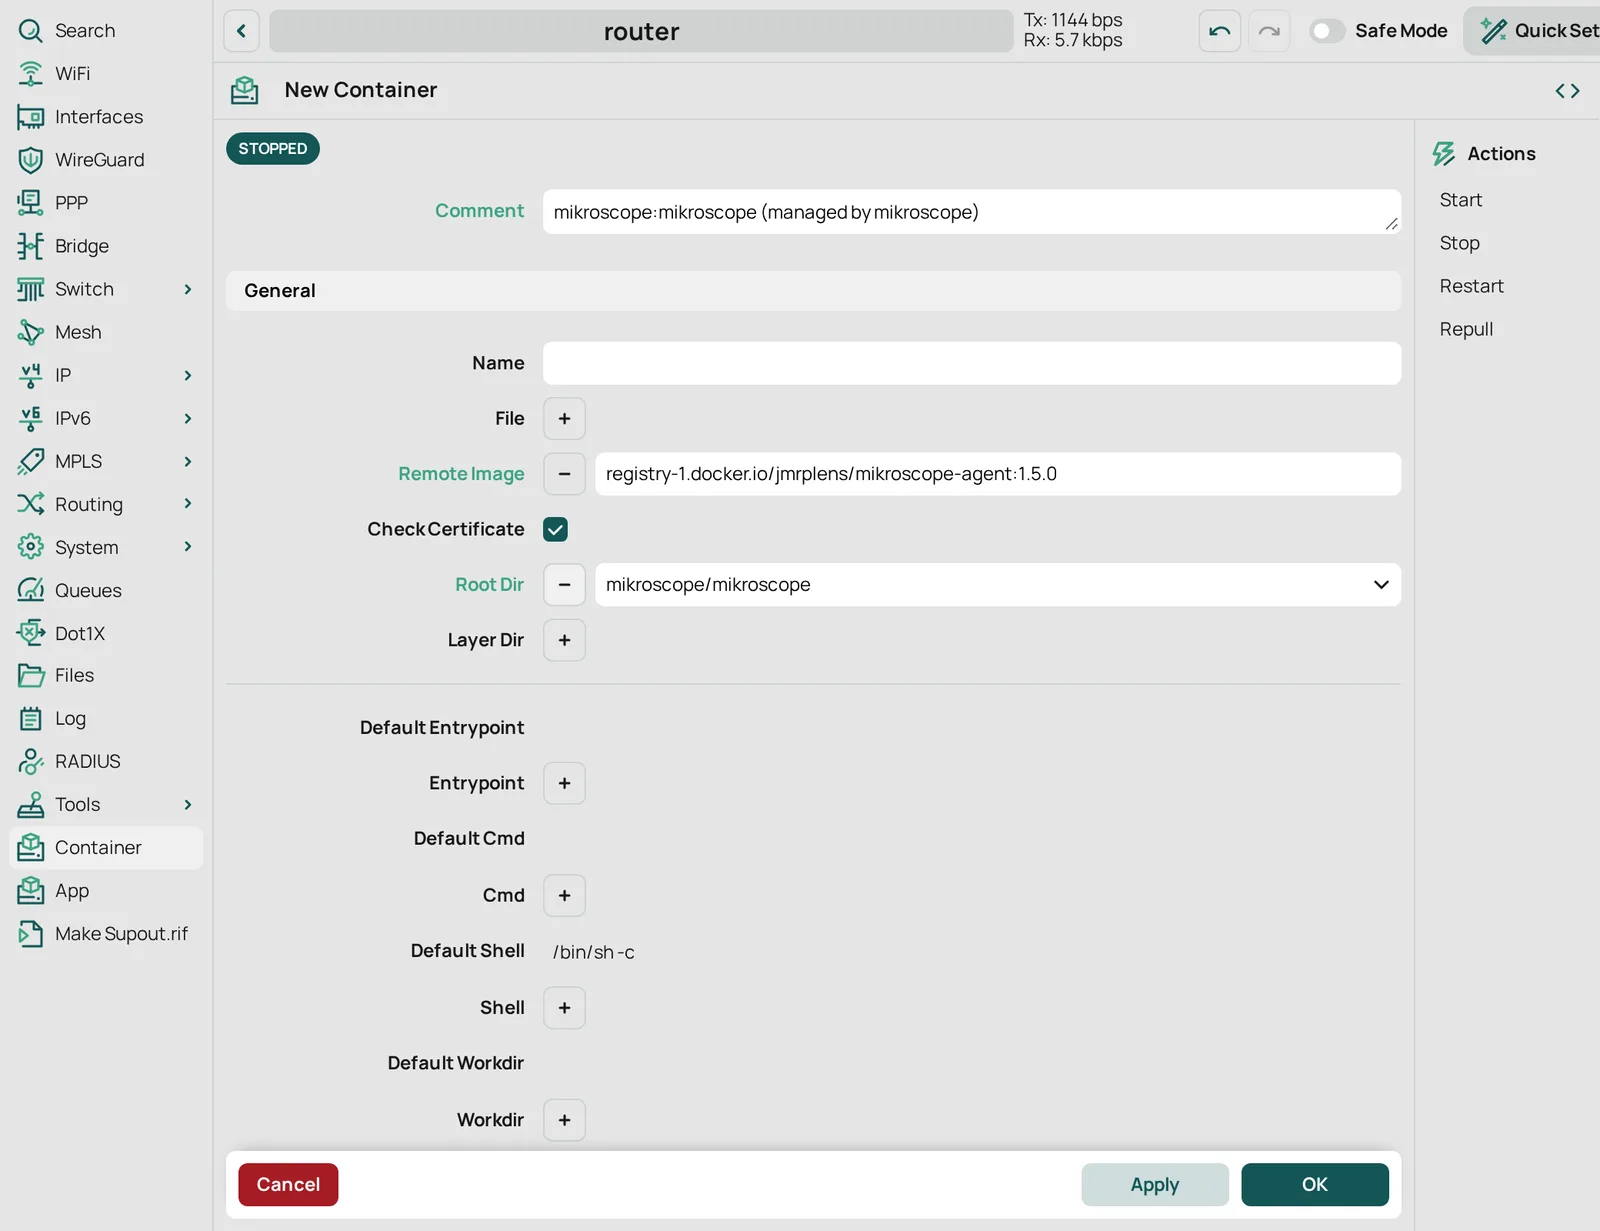
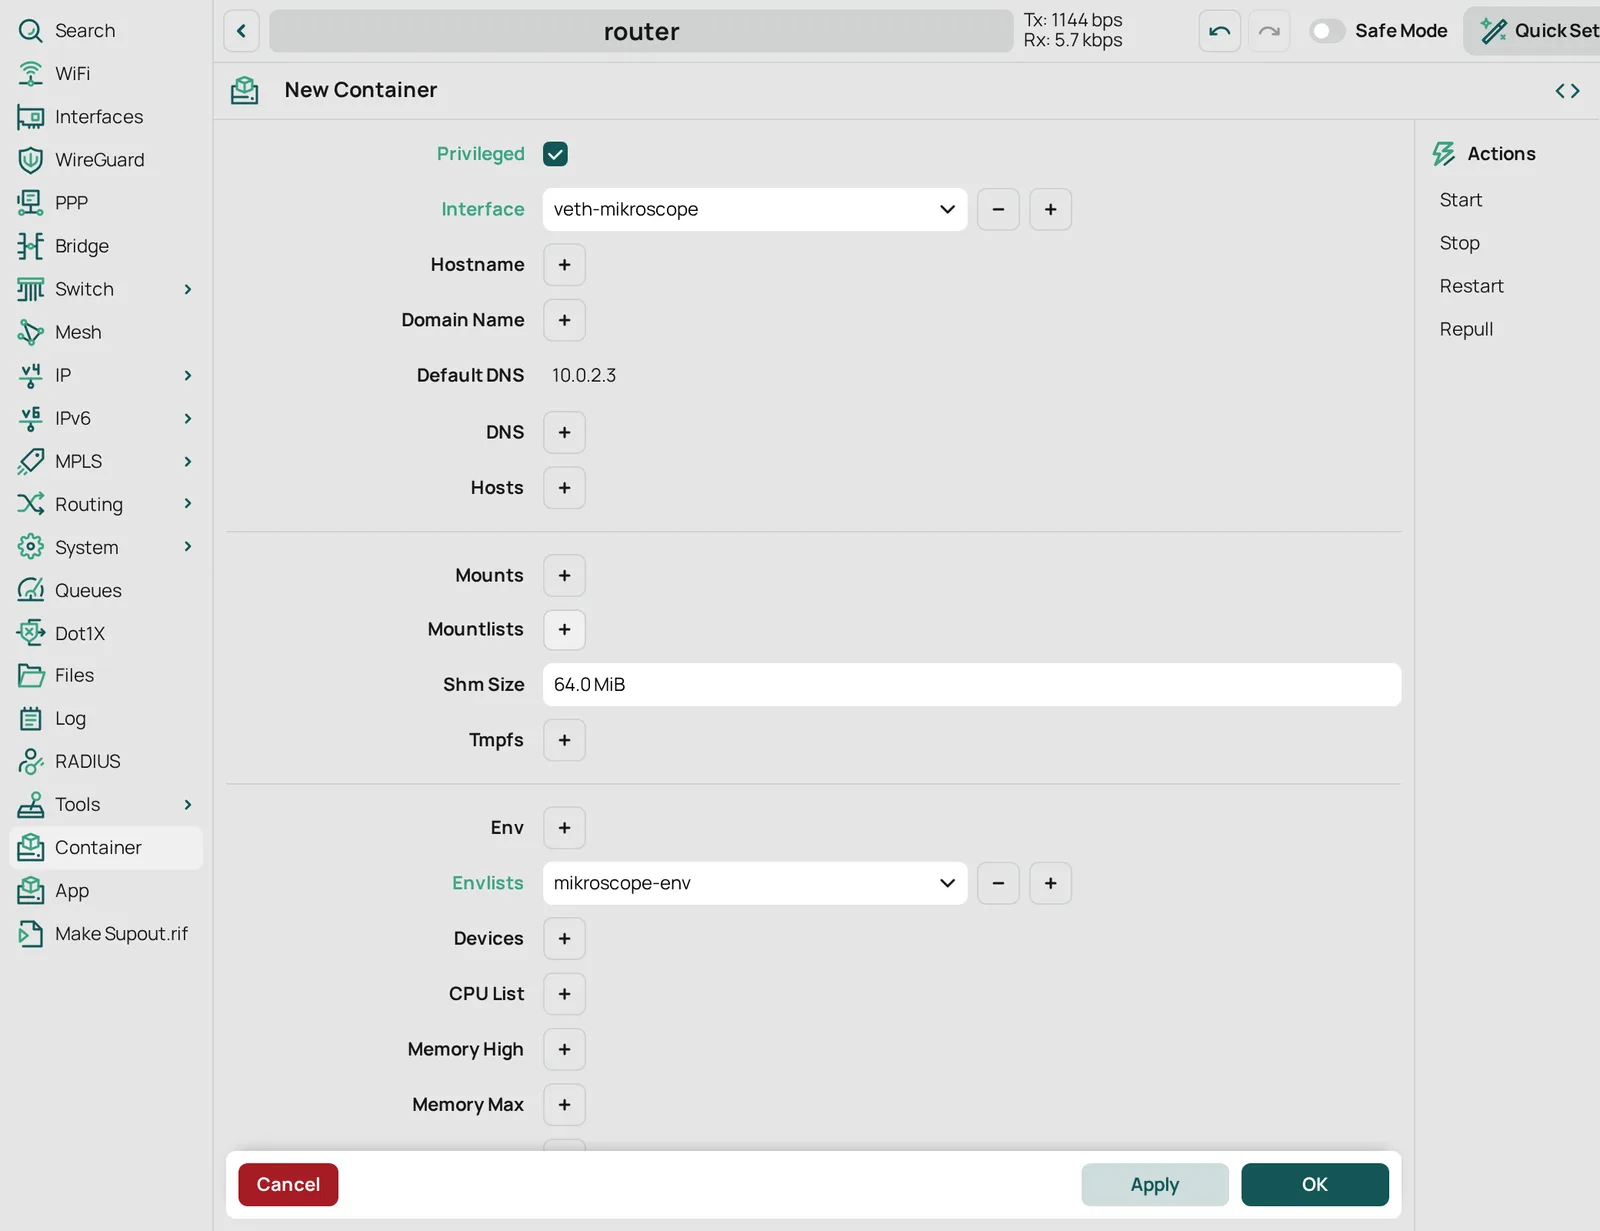
Section titled “Create the container”Container › New:
| Field | Value |
|---|---|
| Comment | mikroscope:mikroscope (managed by mikroscope) |
| Remote Image | registry-1. |
| Root Dir | mikroscope/mikroscope |
| Privileged | ticked |
| Interface | veth-mikroscope |
| Envlists | mikroscope-env |
| Memory Max | 64M |
| Logging | ticked |
| Start On Boot | ticked |
| Restart Policy | on failure (non 0 exit code) |
| Restart Interval | 00:00:10 |
| Restart Max Count | 5 |
Leave Name empty: RouterOS names the container after the image. OK starts the pull: the router pulls the image for its own architecture, so it needs to reach the registry and have room for the layers.
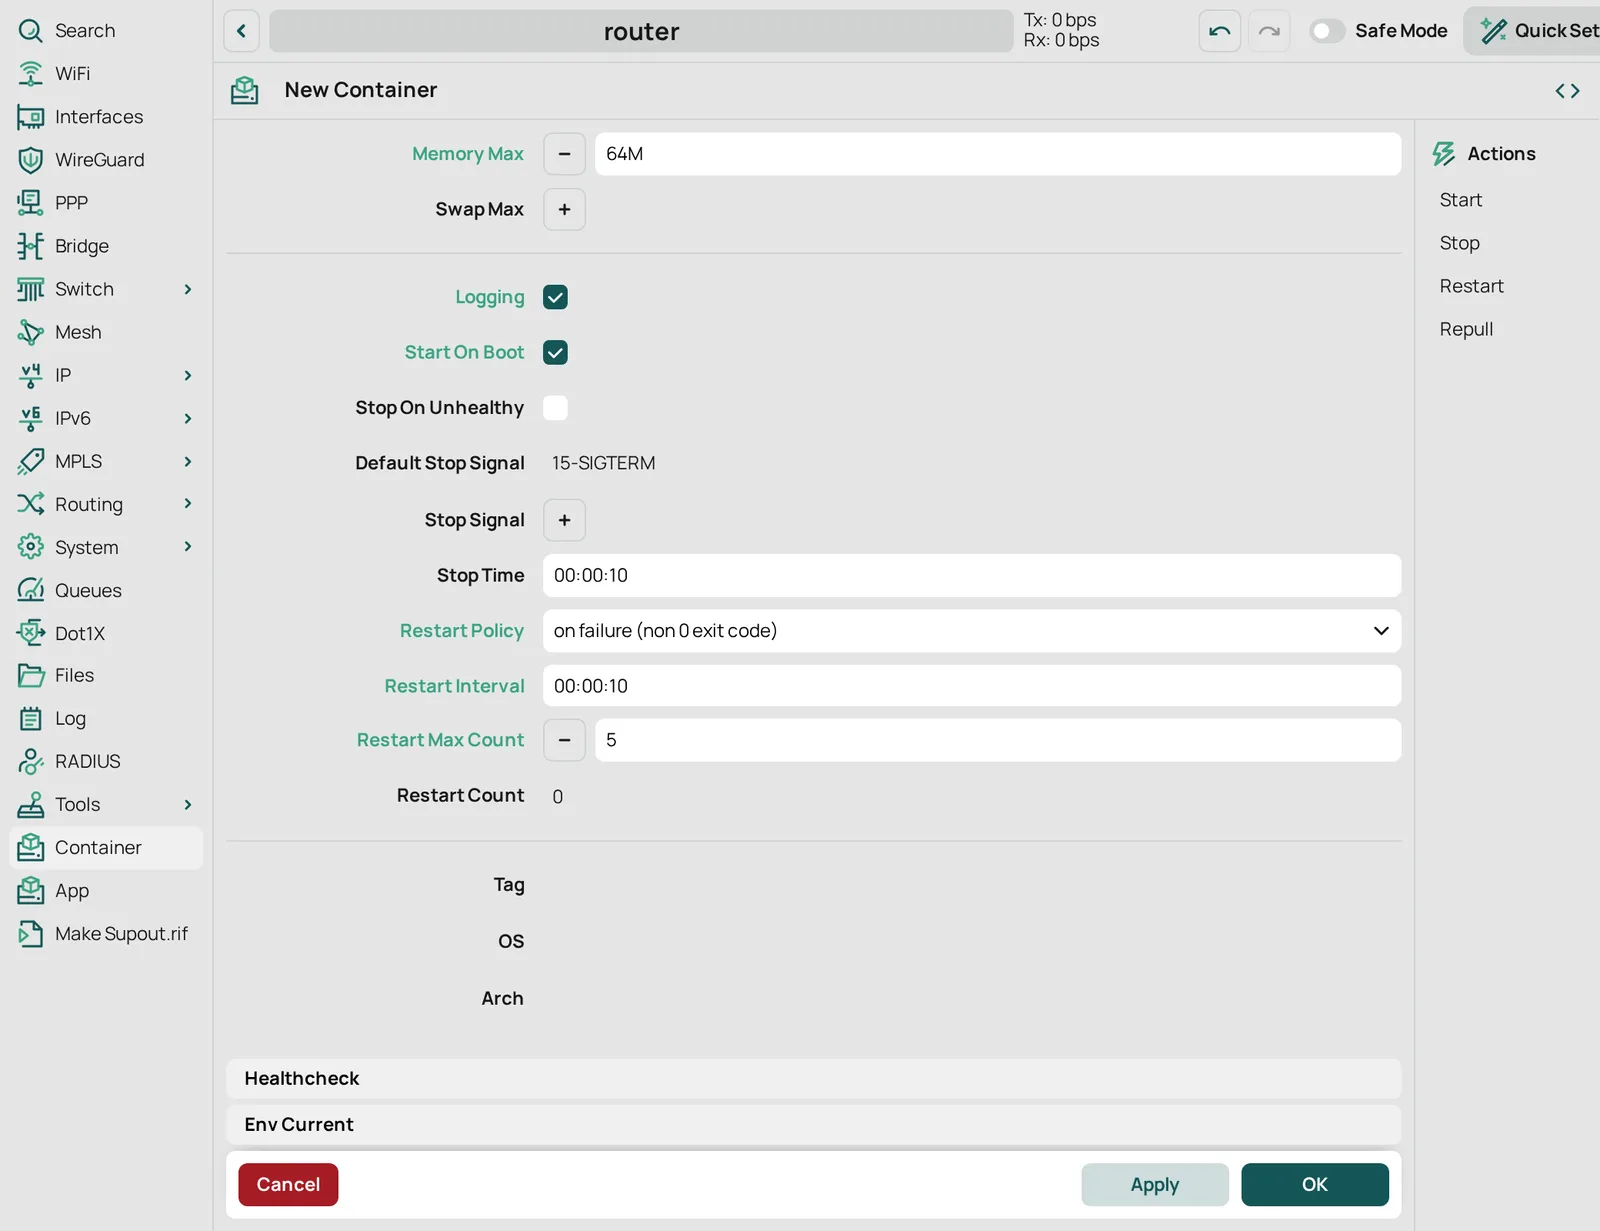
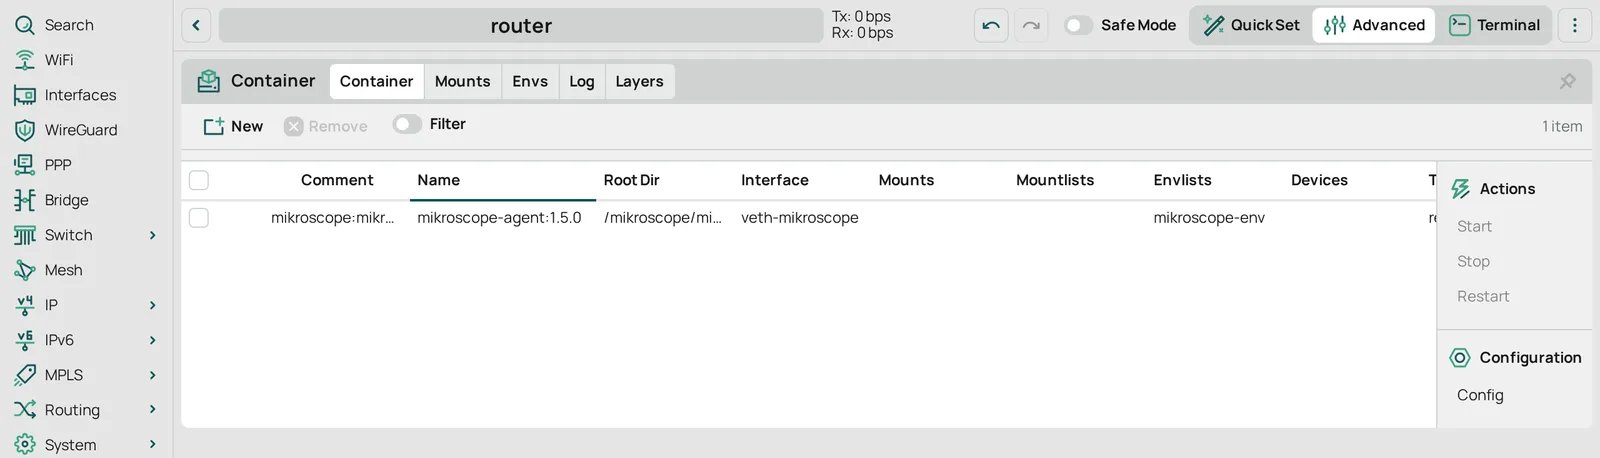
Wait for download/extract done in Log. The row is then ready to start, and does not carry
the R flag yet.
-
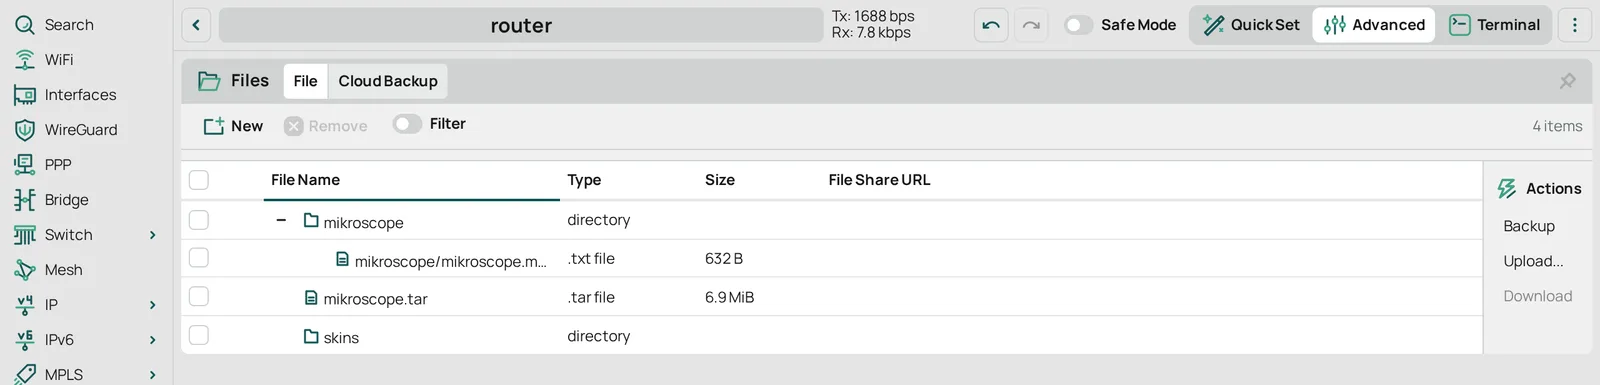
Files › Upload…, and pick
mikroscope.tar. It lands at the top of the router’s storage.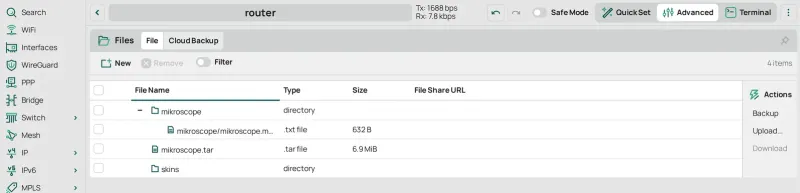
Files › Upload… -
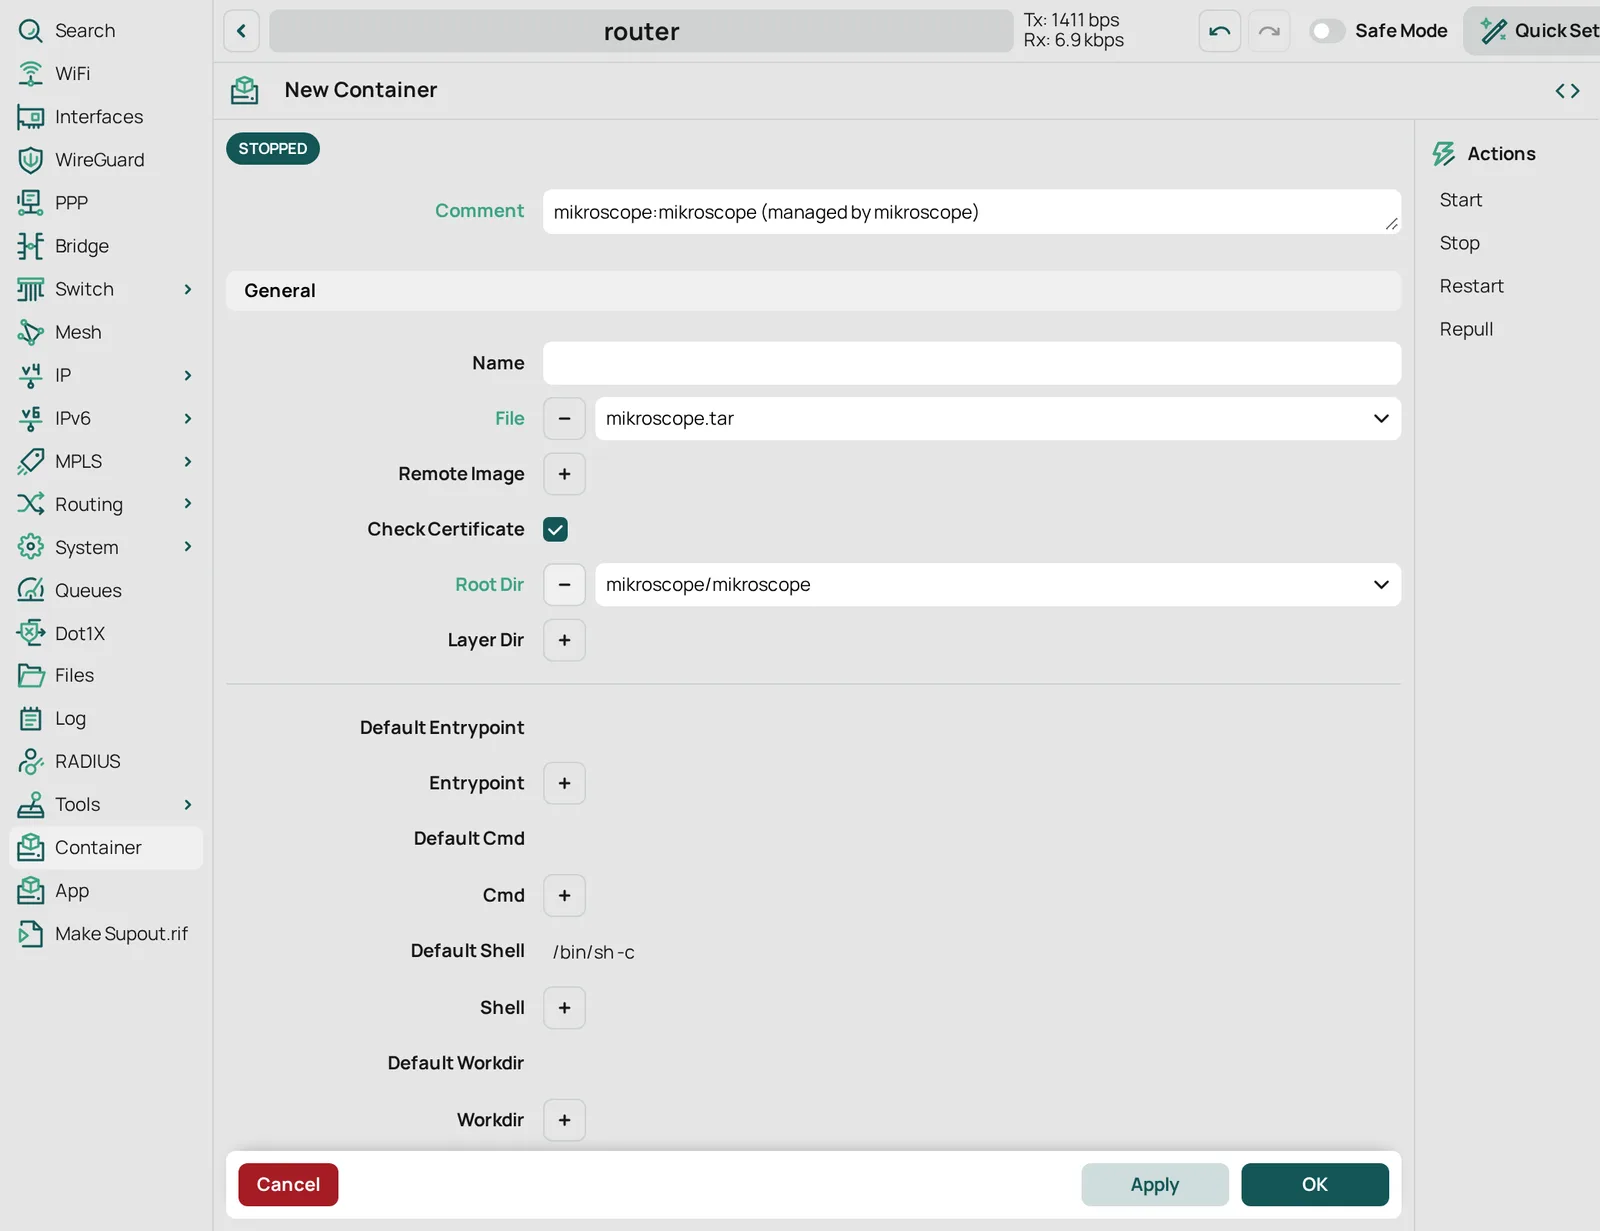
Container › New, with the fields of the registry pull but File
mikroscope.tarin place of Remote Image: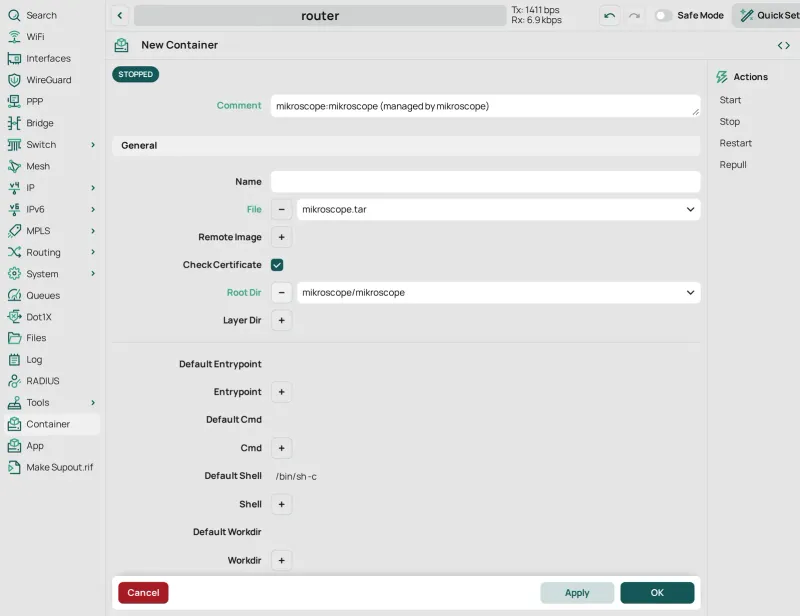
Container › New -
Wait for
download/extract donein Log.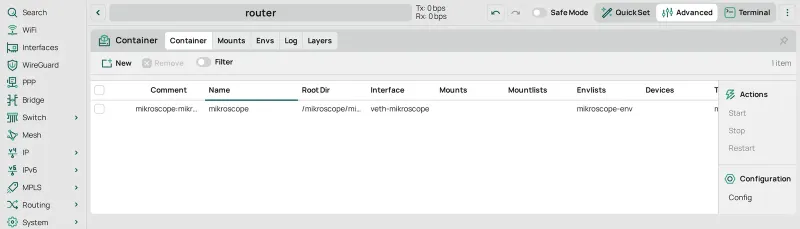
Container
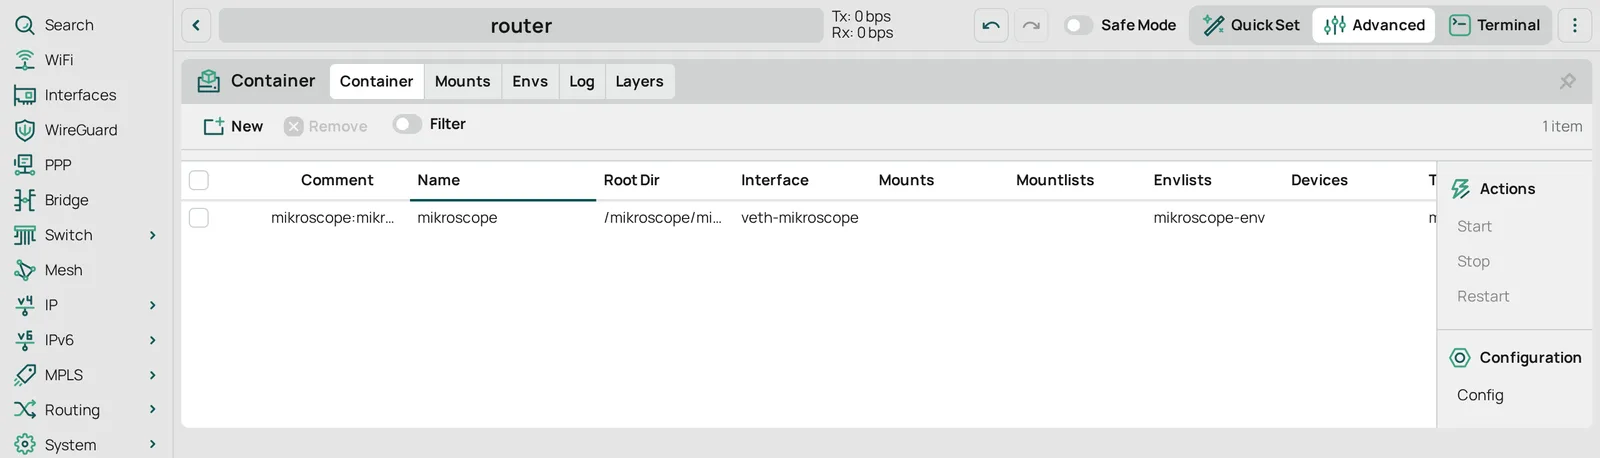
Keep the tar until the next step is done.
Set ignore-remote-image-change
Section titled “Set ignore-remote-image-change”In the terminal, set ignore-remote-image-change, and name restart-policy in the same command: a
/container/set that leaves restart-policy out puts it back to always
(verified).
/container/set [find comment="mikroscope:mikroscope (managed by mikroscope)"] ignore-remote-image-change=yes restart-policy=on-failure:put [/container/get [find comment="mikroscope:mikroscope (managed by mikroscope)"] ignore-remote-image-change]:put [/container/get [find comment="mikroscope:mikroscope (managed by mikroscope)"] restart-policy]The two reads print true and on-failure. install sets it for both image sources: without
it, RouterOS stops and removes the container on its own once the tar is deleted, and re-creates it
minutes later.

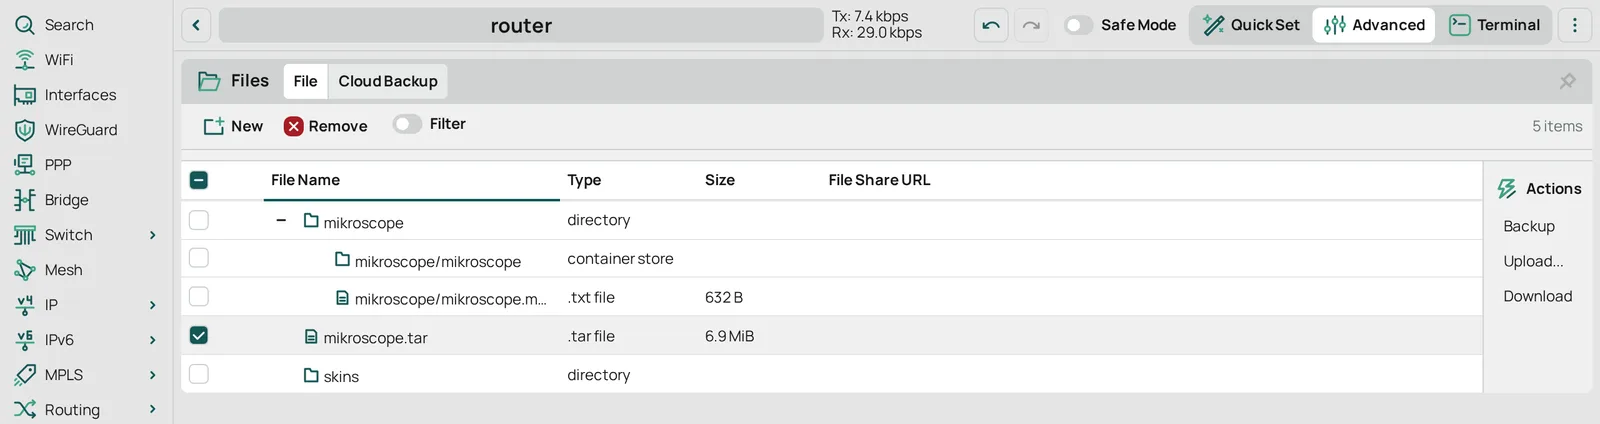
For the image tar, delete it now: Files, select mikroscope.tar, Remove.
Start and verify
Section titled “Start and verify”-
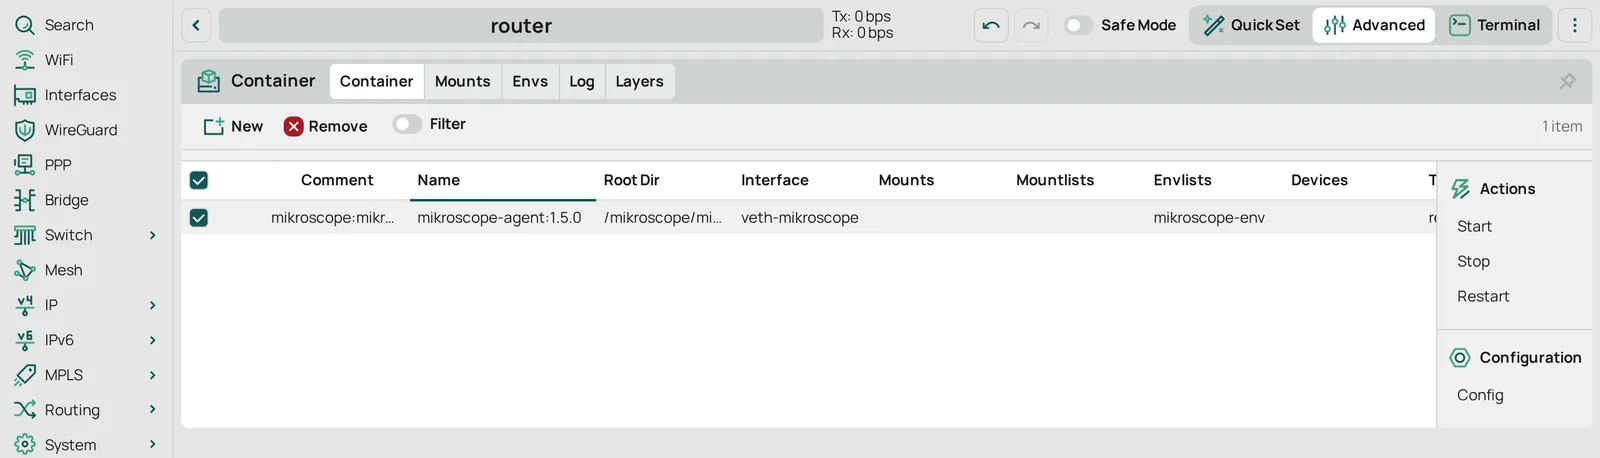
Container, select the row, then Start in the Actions panel.
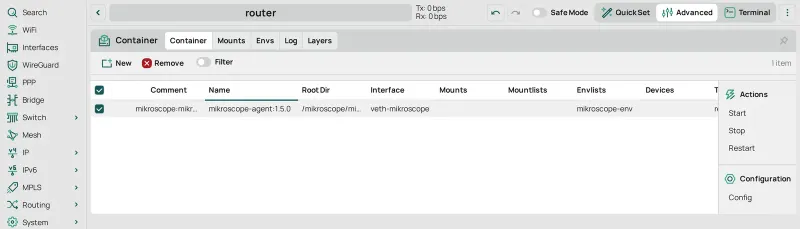
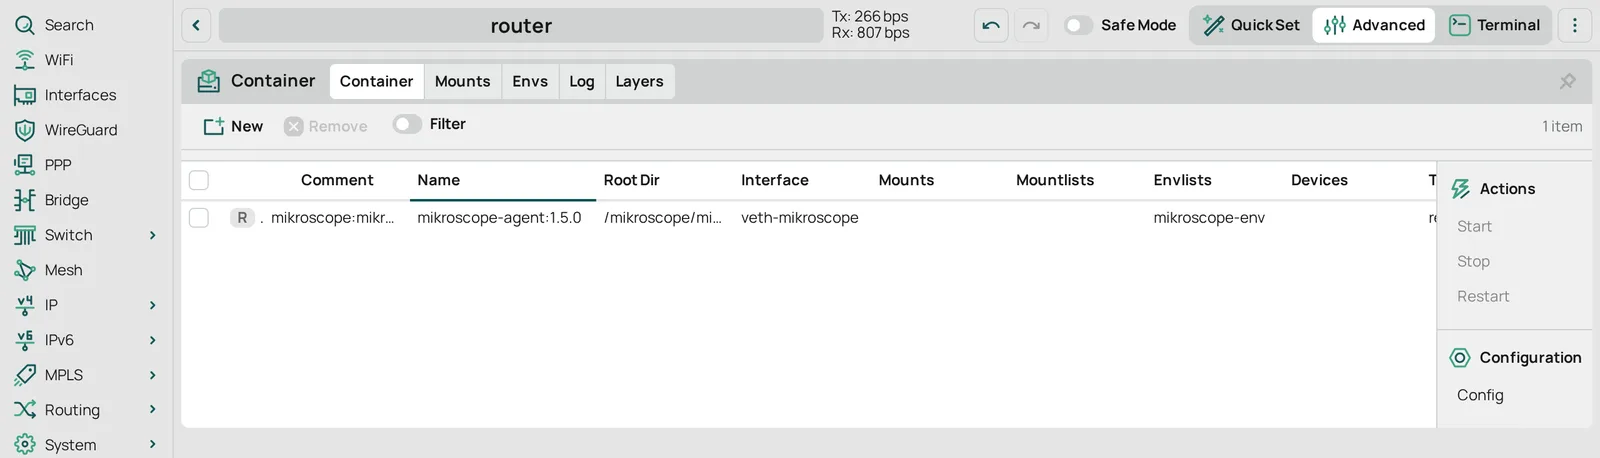
Container › Start The row gets the
R(running) flag.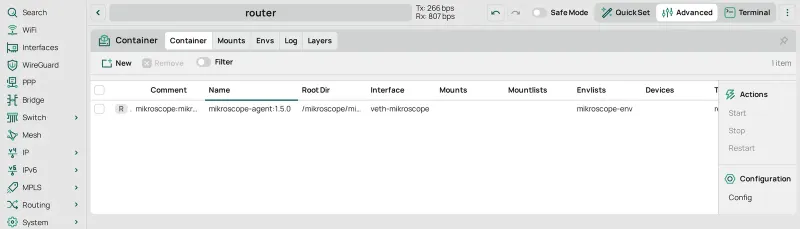
Container -
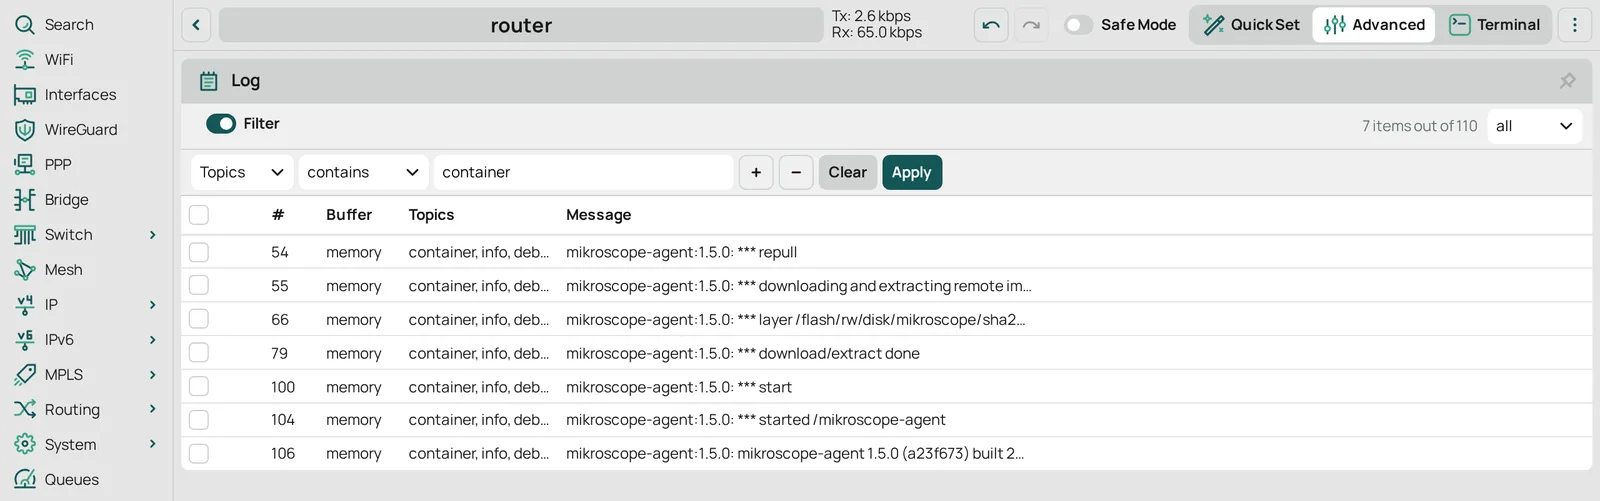
Log, with Filter on and Topics contains
container: the log ends with*** started /mikroscope-agentand the agent’s own line.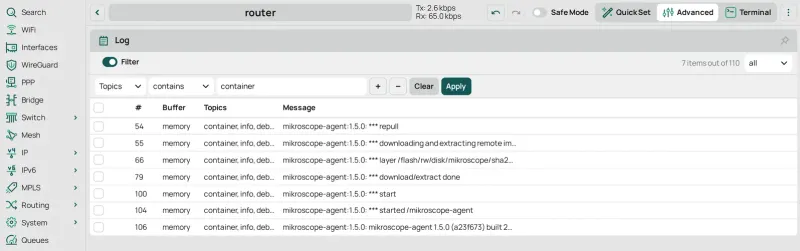
Log -
In the terminal, ask the agent from the router:
:put ([/tool/fetch url="http://172.30.10.2:9123/healthz" output=user as-value]->"data")It prints
{"ok":true,…}.
Terminal

From a computer on the router’s LAN, curl http://172.30.10.2:9123/ answers the same, and
mikroscope status --router … lists every object of the install
(Network access if it does not answer).
Remove
Section titled “Remove”From a computer with the CLI, mikroscope uninstall --router … --yes reads the manifest, removes
everything the steps above created, and checks that nothing is left
(Upgrade and uninstall). Through the menus, remove in this order:
-
Container: select the row, Stop in the Actions panel, wait until the
Rflag is gone, then Remove. RouterOS removes the root dir,mikroscope/mikroscope, with the container; if Files still lists it, remove it there too.Container › Stop, Remove -
Container › Envs: select the seven
mikroscope-enventries, Remove.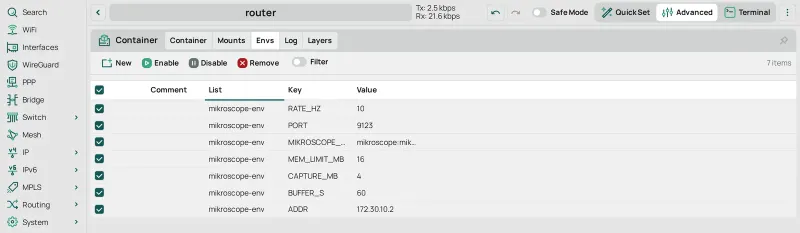
Container › Envs › Remove -
IP › Firewall › Address Lists: the
172.30.10.0/30entry, Remove. -
Interfaces › Interface List: the
veth-mikroscopemember, Remove. -
IP › Addresses:
172.30.10.1/30, Remove. -
Interfaces › VETH:
veth-mikroscope, Remove. -
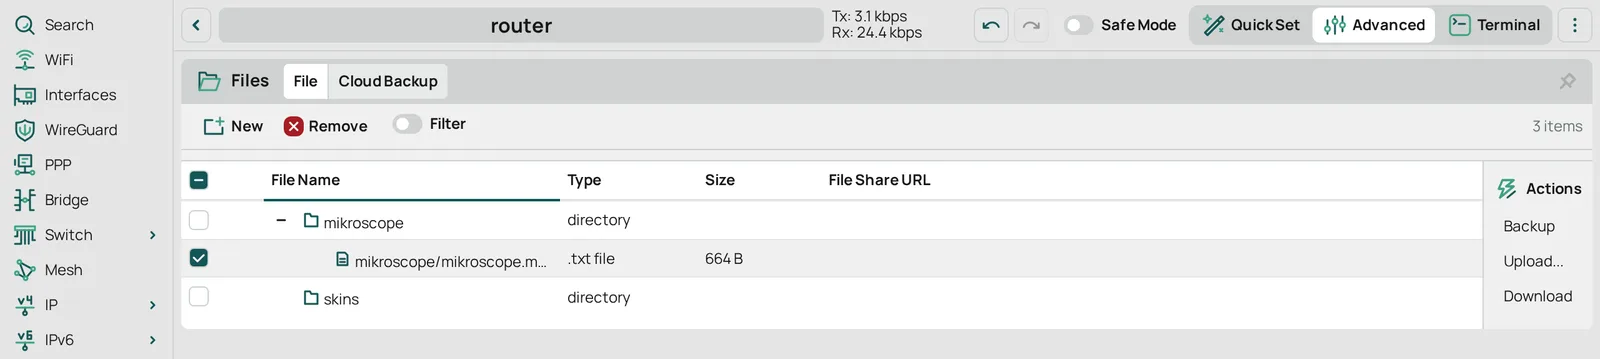
Files:
mikroscope/, Remove; then themikroscope. manifest.txt mikroscopedirectory, if nothing else is in it.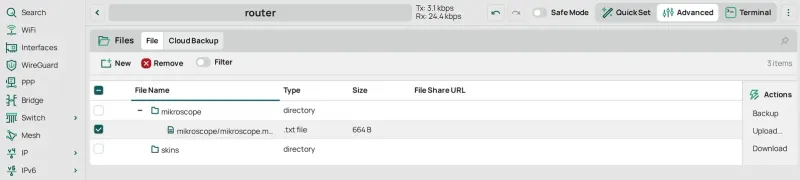
Files › Remove
A tar left behind by an extraction that did not finish goes too: Files, mikroscope.tar,
Remove.